When I’m trying to take a break from web development, I like to build something new and uncommon in Ruby programming. Ruby is typically known for web services, APIs and other web-related development. But with some time, you can build many other types of software.
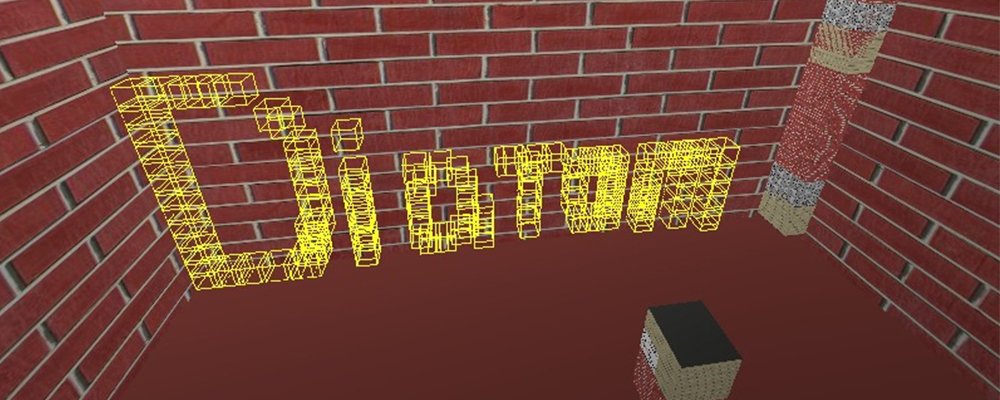
After creating, I started researching Ruby applications that use 3D graphics. I found a nice library, OpenGL for Ruby, and created a few samples with it. At first, it can be difficult to understand everything, but let’s see what can we do!
To start working with OpenGL for Ruby, we only need two gems:
Gemfile.rb:
source "https://rubygems.org"
gem "gosu"
gem "opengl"
I chose gosu because it provides good functionality to work with windows, players and partial rendering of window objects.
Let’s create something simple!
Sometimes it’s hard to imagine how everything should look in 3D, so for the first step, I chose to draw an axis instead of a simple cube.
This is a good way to see how our coordinates lie on the three-dimensional grid. Also, we will set the colour of the lines to define where the x, y and z coordinates are.
I suggest that you separate objects into different classes that will stay under the objects/ directory. So media/axis.rb will contain:
class Axis
  attr_reader :x_width, :y_width, :z_width

  def initialize(x_width, y_width, z_width)
    @x_width = x_width
    @y_width = y_width
    @z_width = z_width
  end

  def self.draw(x_width, y_width, z_width)
    object = new(x_width, y_width, z_width)
    object.draw
  end

  def draw
    glBegin(GL_LINES)
      glColor3d(1, 0, 0)
      glVertex3d(0, 0, 0)
      glVertex3d(x_width, 0, 0)
      glColor3d(0, 1, 0)
      glVertex3d(0, 0, 0)
      glVertex3d(0, y_width, 0)
      glColor3d(0, 0, 1)
      glVertex3d(0, 0, 0)
      glVertex3d(0, 0, z_width)
    glEnd
  end
end
All the OpenGL magic happens in the draw action. glBegin and glEnd works like a ruby block where in argument you need to send the type of object that you want to draw in the argument. You can find all the types in the official documentation.
Inside this block, you set the lines and their colour. This sets the colour for all the lines that you will draw after the method glColor3d. There are lots of different implementations of the glColor method that differ only by the type of argument.glColor3d takes arguments in GLdouble, glColor3f, GLfloat, etc. glColor3d takes three arguments – red, green and blue values. glColor4* can also take an alpha value.
To draw a line, you need to set two points, and OpenGL will draw a line between them. To do this, you need to call glVertex. You can pass two to four arguments of different types, depending on the method you are trying to call. In our case, we are sending the x, y and z coordinates of our future points. You can set as many lines in your glBegin…glEnd block as you wish. In my example, I’m drawing lines from the beginning of the axis (x = 0, y = 0, z = 0) to (x = x_width, y = y_width, z = z_width) in pixels.
require 'opengl'
require 'glu'
require 'gosu'
Dir["objects/*"].each {|file| require_relative file }
include Gl, Glu

class Window < Gosu::Window

  def initialize
    super 800, 600
    self.caption = "Diatom's OpenGL Tutorial"
  end

  def update
  end

  def draw
    gl do
      glClear(GL_COLOR_BUFFER_BIT | GL_DEPTH_BUFFER_BIT)
      Axis.draw(100, 100, 100)
    end
  end

  def button_down(id)
    exit if id == Gosu::KbEscape
  end
end

Window.new.show
glClear clears buffers to preset values. After that we call Axis.draw to draw our axis.
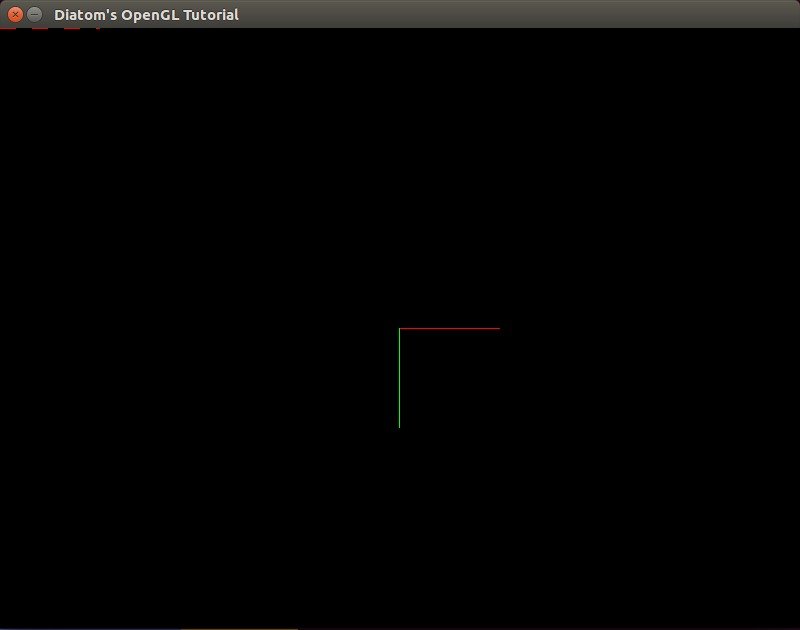
As you can see, we can’t find an y axis because there is a frame border in its place. So if you want, you can set start of the line from (x = 1) instead of (x = 0).
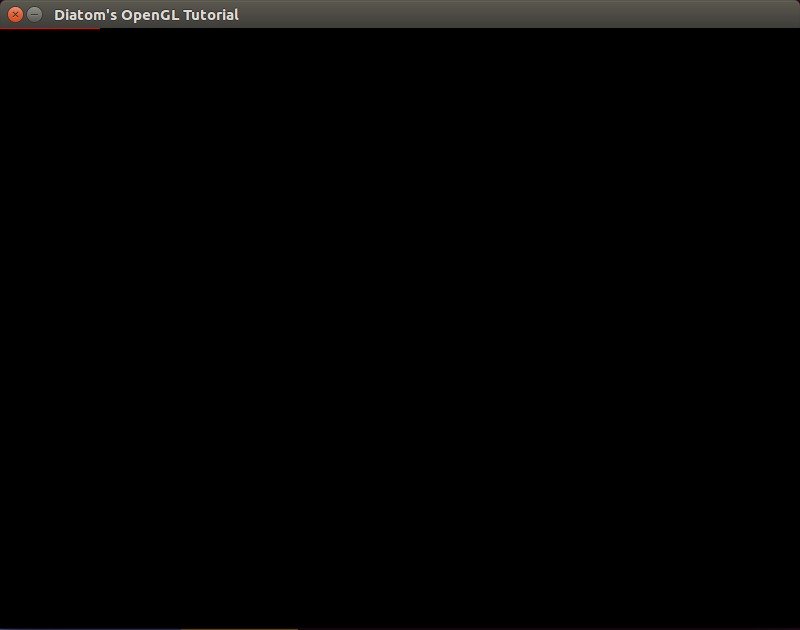
Here we see a problem: what if we want to draw set different objects, but not from the top left corner? What if we want to move to the centre of the axes?
Moving the centre of the axes
To move to the centre of the axes, we can use the glTranslate method. It multiplies the current matrix by a translation matrix and produces a translation by x, y, z. All the objects after the glTranslate method will be drawn depending on those coordinates. To work with both translated and normal coordinates, we need to use the glPushMatrix and glPopMatrix methods, which will save the previous matrix and restore it. glTranslate produces different methods – glTranslated(x, y, z), glTranslatef(x, y, z) etc. – where x, y and z are the coordinates of a translation vector.
Let’s update our code using this method.
 def draw
    gl do
      glClear(GL_COLOR_BUFFER_BIT | GL_DEPTH_BUFFER_BIT)
      glPushMatrix
        glTranslated(width/2, height/2, 0)
        Axis.draw(100, 100, 100)
      glPopMatrix
    end
  end
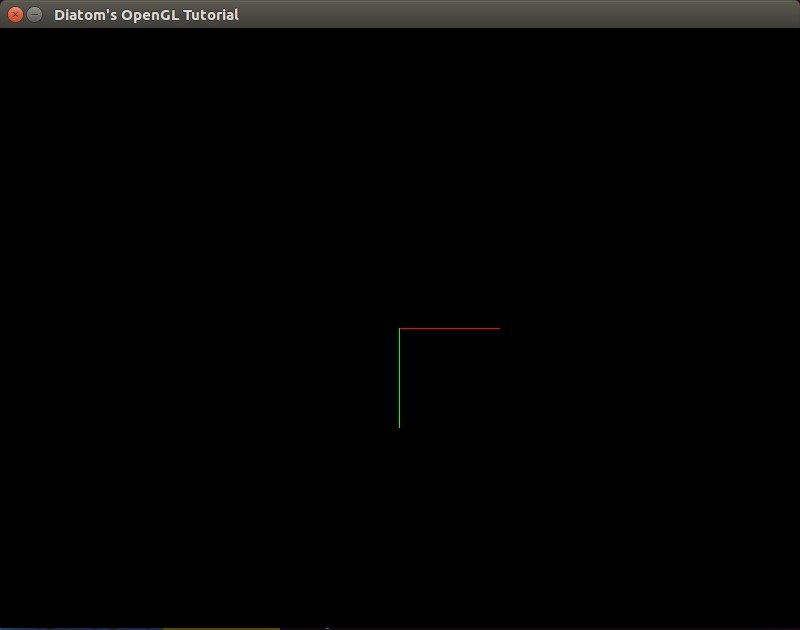
As we can now see, our axis moved to the centre of our screen. To see the difference and how glPushMatrix and glPopMatrix work, let’s add the previous axis too.
 def draw
    gl do
      glClear(GL_COLOR_BUFFER_BIT | GL_DEPTH_BUFFER_BIT)

      glPushMatrix
        glTranslated(width/2, height/2, 0)
        Axis.draw(100, 100, 100)
      glPopMatrix

      glEnable(GL_LINE_STIPPLE)
      glLineStipple(2,0x00FF)

      Axis.draw(100, 100, 100)
      glDisable(GL_LINE_STIPPLE)
    end
  end
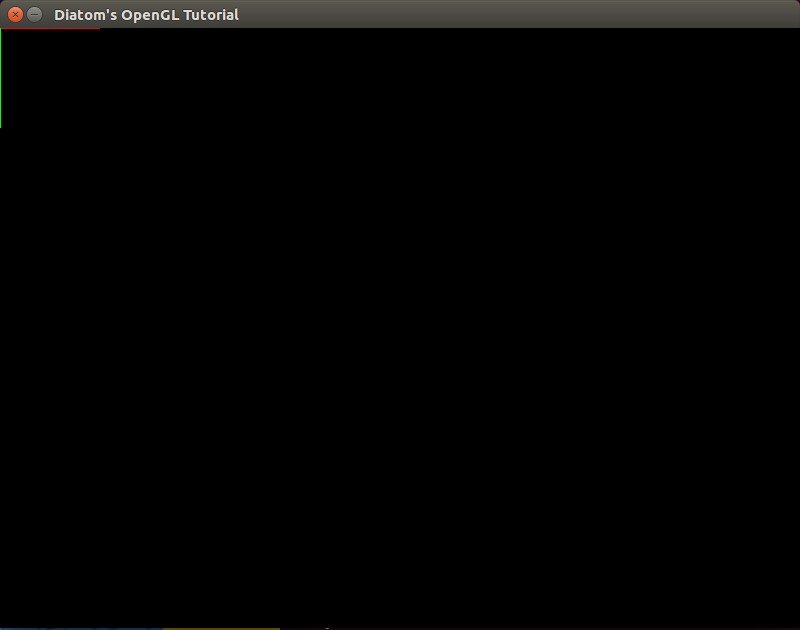
As you can see, the previous axis was drawn on the (0, 0, 0) coordinates with the stippled lines without any change to axis.rb or its coordinates.
It seems like we forgot about the z coordinate that we can’t see on our flat screen. To take a look at it, we need to use a viewpoint.
Getting into the real 3D world
At first, I suggest that you build another object on our scene – a cube. It will help us to see the difference between the angles of our viewpoint.
To draw it, we can use GL_QUADS. Each of the four points defines a Quad, so to make a cube we need six Quads = 24 points.
objects/cube.rb:
require 'pry'
class Cube
  attr_reader :x_width, :y_width, :z_width, :mode, :mode_face

  def initialize(x_width, y_width, z_width, mode_face, mode)
    @x_width = x_width
    @y_width = y_width
    @z_width = z_width
    @mode = mode
    @mode_face = mode_face
  end

  def self.draw(x_width, y_width, z_width, mode_face = GL_FRONT_AND_BACK, mode = GL_FILL)
    object = new(x_width, y_width, z_width, mode_face, mode)
    object.draw
  end

  def draw
    glPolygonMode(mode_face, mode);
    glBegin(GL_QUADS)
      #yx
      glColor3d(1, 0, 0)
      glVertex3d(0, 0, 0)
      glVertex3d(x_width, 0, 0)
      glVertex3d(x_width, y_width, 0)
      glVertex3d(0, y_width, 0)
      #yz
      glColor3d(0, 1, 0)
      glVertex3d(0, y_width, 0)
      glVertex3d(0, 0, 0)
      glVertex3d(0, 0, z_width)
      glVertex3d(0, y_width, z_width)
      #zx
      glColor3d(0, 0, 1)
      glVertex3d(0, 0, z_width)
      glVertex3d(0, 0, 0)
      glVertex3d(x_width, 0, 0)
      glVertex3d(x_width, 0, z_width)
      #z -> yx
      glColor3d(1, 0, 0)
      glVertex3d(0, 0, z_width)
      glVertex3d(x_width, 0, z_width)
      glVertex3d(x_width, y_width, z_width)
      glVertex3d(0, y_width, z_width)
      #x -> yz
      glColor3d(0, 1, 0)
      glVertex3d(x_width, y_width, 0)
      glVertex3d(x_width, 0, 0)
      glVertex3d(x_width, 0, z_width)
      glVertex3d(x_width, y_width, z_width)
      #y -> zx
      glColor3d(0, 0, 1)
      glVertex3d(0, y_width, z_width)
      glVertex3d(0, y_width, 0)
      glVertex3d(x_width, y_width, 0)
      glVertex3d(x_width, y_width, z_width)
    glEnd
  end
end
I’ve added two new variables – arguments for glPolygonMode that set a rasterization mode. The arguments are face (front, back) and mode (GL_POINT, GL_LINE, GL_FILL).
Let’s also update our axes and move code that defines their line types inside.
objects/axis.rb:
class Axis
  attr_reader :x_width, :y_width, :z_width, :stipple

  def initialize(x_width, y_width, z_width, stipple = false)
    @x_width = x_width
    @y_width = y_width
    @z_width = z_width
    @stipple = stipple
  end

  def self.draw(x_width, y_width, z_width, stipple = false)
    object = new(x_width, y_width, z_width, stipple)
    object.draw
  end

  def draw
    if stipple
      glEnable(GL_LINE_STIPPLE)
      glLineStipple(2,0x00FF)
    end
    glBegin(GL_LINES)
      ...
    glEnd
    glDisable(GL_LINE_STIPPLE) if stipple
  end
end
Let’s update our code to use our new cubes.
def draw
    gl do
      glClear(GL_COLOR_BUFFER_BIT | GL_DEPTH_BUFFER_BIT)

      glPushMatrix
        glTranslated(width/2, height/2, 0)
        Axis.draw(100, 100, 100)
        Cube.draw(50, 50, 50, GL_FRONT_AND_BACK, GL_LINE)
      glPopMatrix

      Cube.draw(50, 50, 50, GL_FRONT_AND_BACK, GL_LINE)

      Axis.draw(100, 100, 100, true)
    end
  end
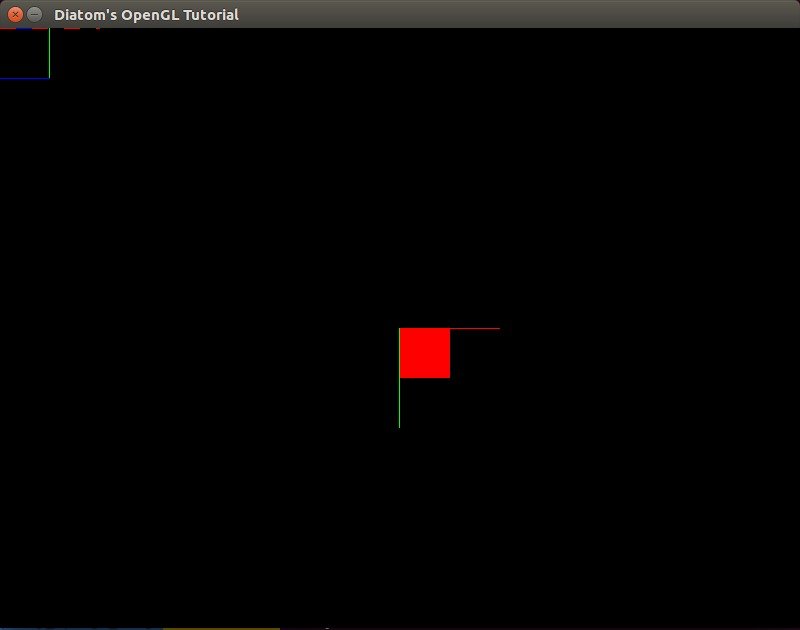
Looks clear, doesn’t it?
To add perspective, we need to use the gluPerspective method, which is used to set up a perspective projection. It’s done once to set up how the scene will be rendered. If gluPerspective is used, the perspective correction will happen while rendering. The arguments are the angle of view, aspect ratio, z-near and z-far.
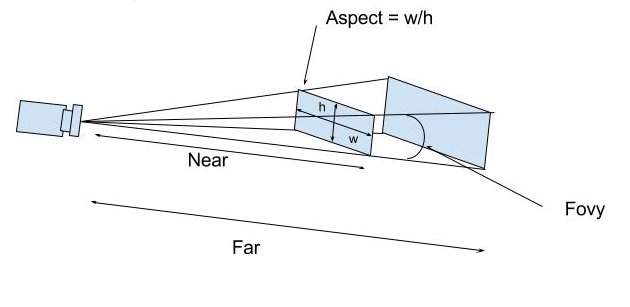
So, let’s add perspective to our application.
def draw
    gl do
      glClear(GL_COLOR_BUFFER_BIT | GL_DEPTH_BUFFER_BIT)

      glMatrixMode(GL_PROJECTION)
    	glLoadIdentity()
    	gluPerspective(130, width.to_f/height, 0, 500)
    	glMatrixMode(GL_MODELVIEW)
    	glLoadIdentity()

      glPushMatrix
        glTranslated(width/2, height/2, 0)
        Axis.draw(100, 100, 100)
        Cube.draw(50, 50, 50, GL_FRONT_AND_BACK, GL_LINE)
      glPopMatrix

      Cube.draw(50, 50, 50, GL_FRONT_AND_BACK, GL_LINE)

      Axis.draw(100, 100, 100, true)
    end
  end
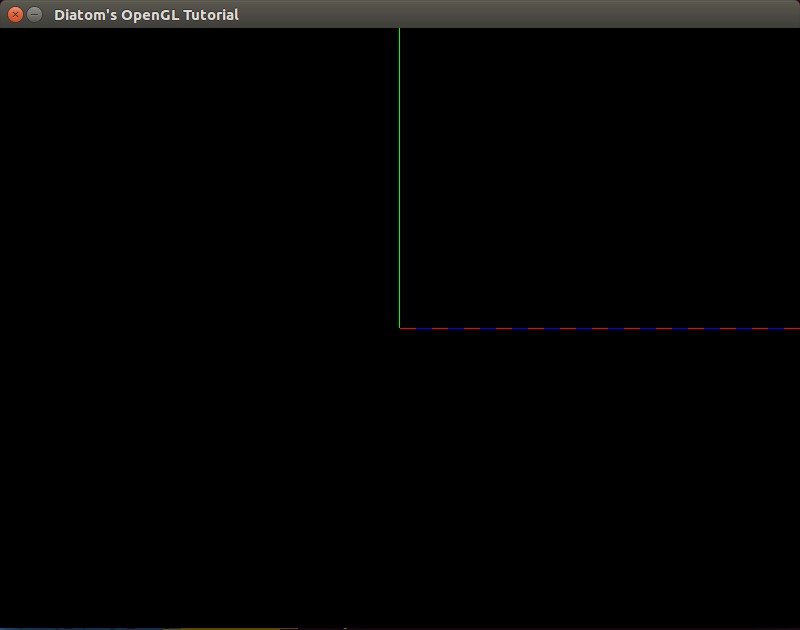
We can see that our field of view has been updated, and we can see only part of our (0, 0, 0) cube and axis. To see what gluPerspective really changes, let’s add a viewpoint.
To turn the player, OpenGL developers usually build a matrix of the view, load it and use later to turn the entire scene around the player. To simplify our code, we will create a ‘camera’ object that will help us look at the whole scene. To do this, we will use gluLookAt.
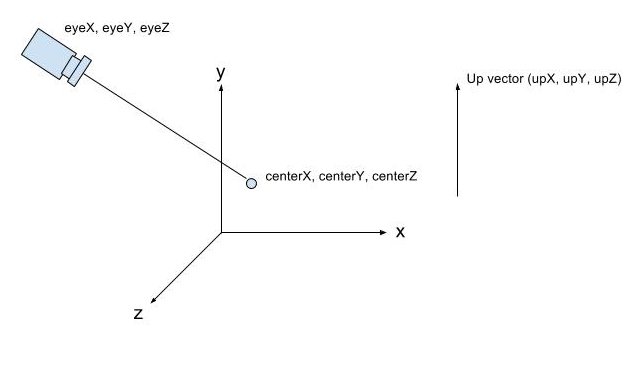
If we don’t set gluLookAt, OpenGL will automatically set it to (x = 0, y = 0, z = 0). Looking at our screen, that will be equal to gluLookAt(0, 0, 1, 0, 0, 0, 0, 1, 0). So, let’s set our gluLookAt properly, so we can see our scene.
  glMatrixMode(GL_MODELVIEW)
  glLoadIdentity()
  <b>gluLookAt(400, 400, 400, 0, 0, 0, 0, 1, 0)</b>
gluLookAt sets our camera to point (x = 400, y = 400, z = 400) and looks at point (x = 0, y = 0, z = 0), three other coordinates of `up` vector that we will not touch for now.
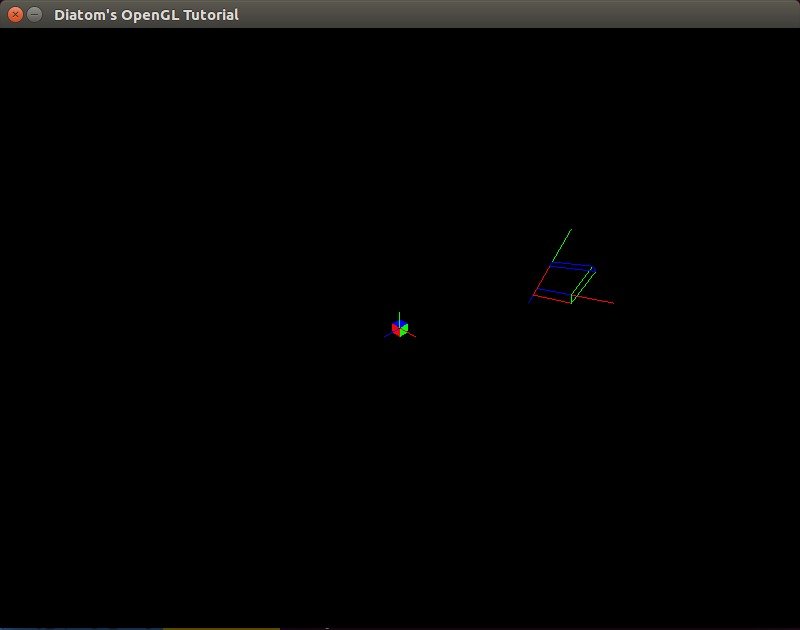
Let’s play with gluPerspective a bit now.
gluPerspective(130, width.to_f/height, 0.001, 225)
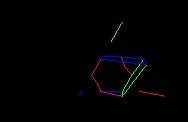
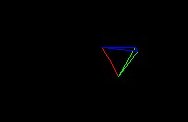
What if we want to move the camera and see the other sides of our scene? Here gosu helps with its built-in I\O mechanisms.
Moving the camera
As you noticed, we can change all of the arguments of the gluLookAt method. To move our camera, we need to bind those changes to the keyboard.
I will not explain the difficult math behind the matrixes and real turning of cameras as it was made in games\applications through formulas of radiuses and angles. I want to move our camera only through axes. I know that it’s not the best solution, but it’s the easiest for understanding.
Let’s move our gluLookAt method inside the new camera object that will be in objects/camera.rb
class Camera
  attr_reader :camera_position, :look_at_object_position, :window, :speed

  def initialize(window)
    @window = window
    @camera_position = Vector3.new(400, 400, 400)
    @look_at_object_position = Vector3.new(0, 0, 0)
    @speed = 10
  end

  def capture
    font = Gosu::Font.new(window, Gosu::default_font_name, 20)
    button_down
    font.draw("Camera position: #{camera_position.x}:#{camera_position.y}:#{camera_position.z}", 10, 10, 3.0, 1.0, 1.0, 0xffffffff)
    font.draw("Look at position: #{look_at_object_position.x}:#{look_at_object_position.y}:#{look_at_object_position.z}", 10, 25, 3.0, 1.0, 1.0, 0xffffffff)
    font.draw("Your speed: #{speed}", 10, 40, 3.0, 1.0, 1.0, 0xffffffff)
    gluLookAt(camera_position.x, camera_position.y, camera_position.z, look_at_object_position.x, look_at_object_position.y, look_at_object_position.z, 0, 1, 0)
  end

  def button_down
    @camera_position.x += speed if Gosu::button_down?(Gosu::KbRight) && !Gosu::button_down?(Gosu::KB_LEFT_SHIFT)
    @camera_position.x -= speed if Gosu::button_down?(Gosu::KbLeft) && !Gosu::button_down?(Gosu::KB_LEFT_SHIFT)
    @camera_position.y += speed if Gosu::button_down?(Gosu::KbUp) && !Gosu::button_down?(Gosu::KB_LEFT_SHIFT)
    @camera_position.y -= speed if Gosu::button_down?(Gosu::KbDown) && !Gosu::button_down?(Gosu::KB_LEFT_SHIFT)
    @camera_position.z += speed if Gosu::button_down?(Gosu::KB_NUMPAD_8) && !Gosu::button_down?(Gosu::KB_LEFT_SHIFT)
    @camera_position.z -= speed if Gosu::button_down?(Gosu::KB_NUMPAD_2) && !Gosu::button_down?(Gosu::KB_LEFT_SHIFT)

    @look_at_object_position.x += speed if Gosu::button_down?(Gosu::KbRight) && Gosu::button_down?(Gosu::KB_LEFT_SHIFT)
    @look_at_object_position.x -= speed if Gosu::button_down?(Gosu::KbLeft) && Gosu::button_down?(Gosu::KB_LEFT_SHIFT)
    @look_at_object_position.y += speed if Gosu::button_down?(Gosu::KbUp) && Gosu::button_down?(Gosu::KB_LEFT_SHIFT)
    @look_at_object_position.y -= speed if Gosu::button_down?(Gosu::KbDown) && Gosu::button_down?(Gosu::KB_LEFT_SHIFT)
    @look_at_object_position.z += speed if Gosu::button_down?(Gosu::KB_NUMPAD_8) && Gosu::button_down?(Gosu::KB_LEFT_SHIFT)
    @look_at_object_position.z -= speed if Gosu::button_down?(Gosu::KB_NUMPAD_2) && Gosu::button_down?(Gosu::KB_LEFT_SHIFT)
  end
end
To understand how everything is working, I bind each axis to a key. Here is the schema to move the camera:
UP, DOWN - by Y axis
LEFT, RIGHT - by X axis
NUM8, NUM2 - by Z axis
To move the target point, you need to hold shift, clicking on the same buttons.
I can display the current coordinates of points and the current camera speed using gosu’s text output methods. To do this, we need to pass a ‘window’ object into our class and work with it. For camera position, I wrote a Vector3 class that contains x, y and z coordinates:
objects/vector3.rb:
Vector3 = Struct.new(:x, :y, :z)
After we build our camera class, let’s use it inside run.rb.
  def draw
    gl do
      glClear(GL_COLOR_BUFFER_BIT | GL_DEPTH_BUFFER_BIT)

      glMatrixMode(GL_PROJECTION)
    	glLoadIdentity()
    	gluPerspective(90, width.to_f/height, 0, 500)
    	glMatrixMode(GL_MODELVIEW)
    	glLoadIdentity()

      @camera.capture

      glPushMatrix
        glTranslated(width/2, height/2, 0)
        Axis.draw(100, 100, 100)
        Cube.draw(50, 50, 50, GL_FRONT_AND_BACK, GL_LINE)
      glPopMatrix

      Cube.draw(50, 50, 50, GL_FRONT_AND_BACK, GL_FILL)

      Axis.draw(100, 100, 100, true)

    end
  end
‘Fly’ a bit on our scene to see how gluLookAt works.
I suggest rewriting the keyboard settings a bit to make them more useful. Also, I want to be able to increase our camera’s speed. For this I want to rewrite the camera object:
objects/camera.rb
def button_down
    check_speed
    case
    when Gosu::button_down?(Gosu::KbD)
      @camera_position.x += speed
      @look_at_object_position.x += speed
    when Gosu::button_down?(Gosu::KbA)
      @camera_position.x -= speed
      @look_at_object_position.x -= speed
    when Gosu::button_down?(Gosu::KbW)
      @camera_position.z -= speed
      @look_at_object_position.z -= speed
    when Gosu::button_down?(Gosu::KbS)
      @camera_position.z += speed
      @look_at_object_position.z += speed
    when Gosu::button_down?(Gosu::KbUp)
      @look_at_object_position.y += speed
    when Gosu::button_down?(Gosu::KbDown)
      @look_at_object_position.y -= speed
    when Gosu::button_down?(Gosu::KbRight)
      @look_at_object_position.x += speed
    when Gosu::button_down?(Gosu::KbLeft)
      @look_at_object_position.x -= speed
    end
  end

  def check_speed
    @speed = 10
    @speed = 20 if Gosu::button_down?(Gosu::KB_LEFT_SHIFT)
  end
Let’s use the W and S keys to move the camera on the z axis, A and D to move the camera on the x axis, UP and DOWN to move the target of view on the y axis and LEFT and RIGHT to move the target of view on the x axis. Holding shift will increase our speed.
Let’s play!
Let’s add a cube object filled with lines to our pointer. To do this, we need to update our cube code to receive the current coordinates and build a cube depending on them.
objects/cube.rb
require 'pry'
class Cube
  attr_reader :position, :x_width, :y_width, :z_width, :mode, :mode_face

  def initialize(x_width, y_width, z_width, mode_face, mode, x = 0, y = 0, z = 0)
    @x_width = x_width
    @y_width = y_width
    @z_width = z_width
    @mode = mode
    @mode_face = mode_face
    @position = Vector3.new(x, y, z)
  end

  def self.draw(x_width, y_width, z_width, mode_face = GL_FRONT_AND_BACK, mode = GL_FILL, x = 0, y = 0, z = 0)
    object = new(x_width, y_width, z_width, mode_face, mode, x, y, z)
    object.draw
  end

  def draw
    glPolygonMode(mode_face, mode);
    glBegin(GL_QUADS)
      #yx
      glColor3d(1, 0, 0)
      glVertex3d(position.x, position.y, position.z)
      glVertex3d(x_width + position.x, position.y, position.z)
      glVertex3d(x_width + position.x, y_width + position.y, position.z)
      glVertex3d(position.x, y_width + position.y, position.z)
      #yz
      glColor3d(0, 1, 0)
      glVertex3d(position.x, y_width + position.y, position.z)
      glVertex3d(position.x, position.y, position.z)
      glVertex3d(position.x, position.y, z_width + position.z)
      glVertex3d(position.x, y_width + position.y, z_width + position.z)
      #zx
      glColor3d(0, 0, 1)
      glVertex3d(position.x, position.y, z_width + position.z)
      glVertex3d(position.x, position.y, position.z)
      glVertex3d(x_width + position.x, position.y, position.z)
      glVertex3d(x_width + position.x, position.y, z_width + position.z)
      #z -> yx
      glColor3d(1, 0, 0)
      glVertex3d(position.x, position.y, z_width + position.z)
      glVertex3d(x_width + position.x, position.y, z_width + position.z)
      glVertex3d(x_width + position.x, y_width + position.y, z_width + position.z)
      glVertex3d(position.x, y_width + position.y, z_width + position.z)
      #x -> yz
      glColor3d(0, 1, 0)
      glVertex3d(x_width + position.x, y_width + position.y, position.z)
      glVertex3d(x_width + position.x, position.y, position.z)
      glVertex3d(x_width + position.x, position.y, z_width + position.z)
      glVertex3d(x_width + position.x, y_width + position.y, z_width + position.z)
      #y -> zx
      glColor3d(0, 0, 1)
      glVertex3d(position.x, y_width + position.y, z_width + position.z)
      glVertex3d(position.x, y_width + position.y, position.z)
      glVertex3d(x_width + position.x, y_width + position.y, position.z)
      glVertex3d(x_width + position.x, y_width + position.y, z_width + position.z)

      glColor3d(1, 1, 1) #return back primary color
    glEnd
  end
end
Now we can update our main window’s method draw with this code
 glPushMatrix
    glTranslated(width/2, height/2, 0)
    Axis.draw(100, 100, 100)
    Cube.draw(50, 50, 50, GL_FRONT_AND_BACK, GL_FILL)
    Cube.draw(50, 50, 50, GL_FRONT_AND_BACK, GL_LINE, @camera.look_at_object_position.x, @camera.look_at_object_position.y, @camera.look_at_object_position.z)
  glPopMatrix
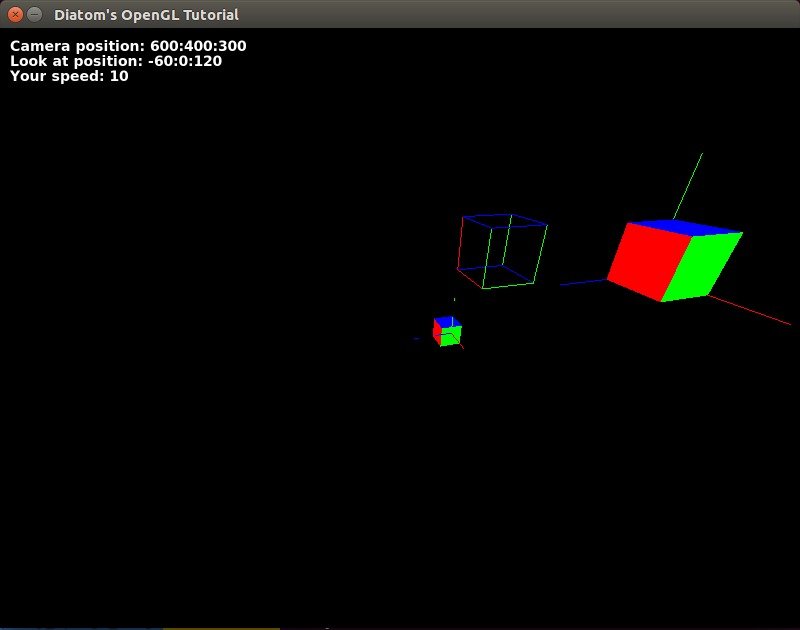
At the end, you should see this view:
Cube creator
What if we want to place some new cubes? Easy!
Let’s change our run.rb code to
require 'opengl' require 'glu' require 'gosu' Dir["objects/*"].each {|file| require_relative file } include Gl, Glu class Window < Gosu::Window <b>attr_accessor :scene_objects, :translation</b> def initialize super 800, 600 self.caption = "Diatom's OpenGL Tutorial" @camera = Camera.new(self) <b>@scene_objects = [] @translation = Vector3.new(width/2, height/2,0)</b> end def update end def draw gl do glClear(GL_COLOR_BUFFER_BIT | GL_DEPTH_BUFFER_BIT) glMatrixMode(GL_PROJECTION) glLoadIdentity() gluPerspective(90, width.to_f/height, 0, 500) glMatrixMode(GL_MODELVIEW) glLoadIdentity() @camera.capture <b>@scene_objects << Axis.new(100, 100, 100) @scene_objects << Cube.new(50, 50, 50, GL_FRONT_AND_BACK, GL_FILL)</b> glPushMatrix <b>glTranslated(translation.x, translation.y, translation.z) @scene_objects.each do |object| object.draw end</b> glPopMatrix Cube.draw(50, 50, 50, GL_FRONT_AND_BACK, GL_LINE, @camera.look_at_object_position.x, @camera.look_at_object_position.y, @camera.look_at_object_position.z) Cube.draw(50, 50, 50, GL_FRONT_AND_BACK, GL_FILL) Axis.draw(100, 100, 100, true) end end def button_down(id) exit if id == Gosu::KbEscape <b>add_cube if id == Gosu::KbSpace</b> end <b> def add_cube @scene_objects << Cube.new( 50, 50, 50, GL_FRONT_AND_BACK, GL_FILL, @camera.look_at_object_position.x - translation.x, @camera.look_at_object_position.y - translation.y, @camera.look_at_object_position.z - translation.z ) end </b> end Window.new.show
I have highlighted the changes. As you will notice, I moved the translation vector to the variable of Vector3 class, moved all objects that will be translated and drawn on the scene to the array @scene_objects and then placed them on the scene with a loop.
To add a new cube, I can just create a new cube object and place it in the array. Coordinates should depend on the translation vector to place everything on valid places.
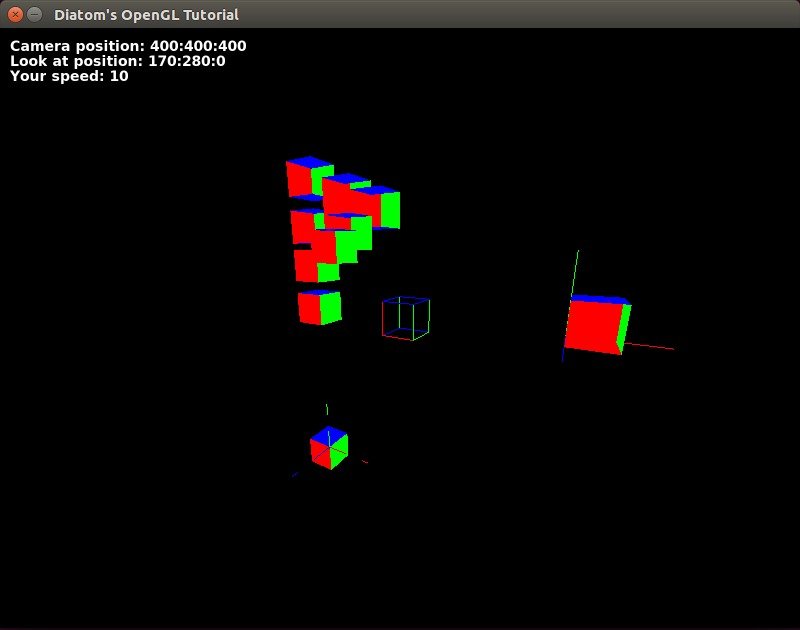
Let’s add some textures. We can create a gosu image object from file and then get texture information from it with the gl_tex_info method. To build it, let’s add a class ‘texture.’
class Texture
  attr_accessor :info
  def initialize(window, filepath)
    @image = Gosu::Image.new(window, filepath, {tileable: true, retro: false})
    @info = @image.gl_tex_info
    # gl_tex_info can return nil if the image was too large to fit onto
    # a single OpenGL texture and was internally split up.
  end
end
Then we will need to update our cube draw method with:
texture_info = texture.info
  glEnable(GL_TEXTURE_2D) # enables two-dimensional texturing to perform
    glBindTexture(GL_TEXTURE_2D, texture_info.tex_name) # bing named texture to a target
    glPixelStorei(GL_UNPACK_ALIGNMENT,1)
    draw_textured_cube
  glDisable(GL_TEXTURE_2D)
where specify the texture’s edge that will be assigned to that point. Basically, the texture’s left bottom coordinates are (0, 0) and top right coordinates are (1, 1), and we stretch it between the edges of our cube. Code sample for one side:
glTexCoord2d(0,0); glVertex3d(position.x, position.y, position.z)
  glTexCoord2d(1,0); glVertex3d(x_width + position.x, position.y, position.z)
  glTexCoord2d(1,1); glVertex3d(x_width + position.x, y_width + position.y, position.z)
  glTexCoord2d(0,1); glVertex3d(position.x, y_width + position.y, position.z)
By adding some lights with
  glEnable(GL_LIGHTING)
    glLightfv(GL_LIGHT0, GL_AMBIENT, [0.5, 0.5, 0.5, 1])
    glLightfv(GL_LIGHT0, GL_DIFFUSE, [1, 1, 1, 1])
    glLightfv(GL_LIGHT0, GL_POSITION, [1, 1, 1,1])
    glLightfv(GL_LIGHT1, GL_AMBIENT, [0.5, 0.5, 0.5, 1])
    glLightfv(GL_LIGHT1, GL_DIFFUSE, [1, 1, 1, 1])
    glLightfv(GL_LIGHT1, GL_POSITION, [100, 100, 100,1])
  glEnable(GL_LIGHT0)
depth test to depth buffer comparisons
glEnable(GL_DEPTH_TEST);
glDepthMask(GL_TRUE);
glDepthFunc(GL_LEQUAL);
and textures with
glEnable(GL_TEXTURE_2D) # enables two-dimensional texturing to perform
glBindTexture(GL_TEXTURE_2D, texture_info.tex_name) # bing named texture to a target
glPixelStorei(GL_UNPACK_ALIGNMENT,1)
we can build nice textured scene with real lighting.
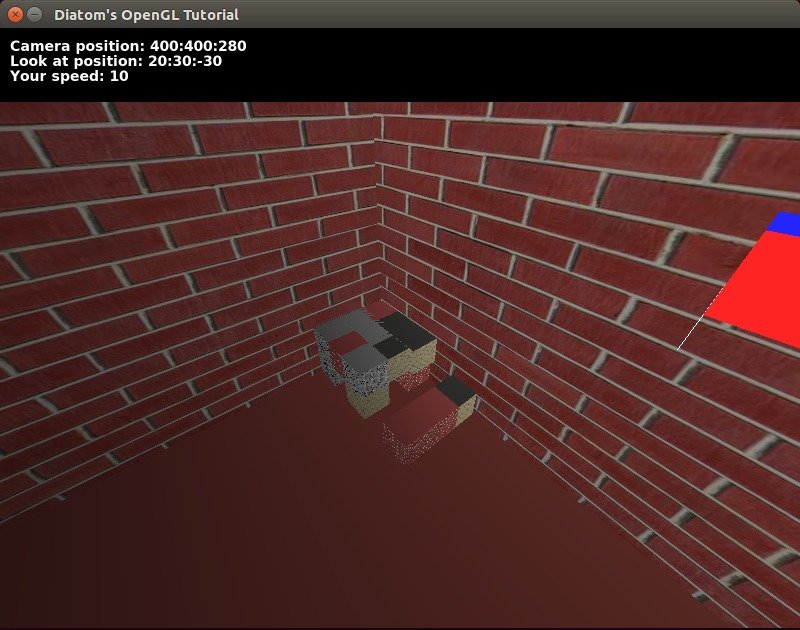
With some additional work, we can achieve a switch of material for blocks that we are trying to build and other nice things.
Video: YouTube
All the code for that can be found at our repository on GitHub
OpenGL is common everywhere and learning it once, you will be able to build projects with it on any language. The same is with Ruby. Just imagine something cool, and we can build it with Ruby!
